by Katherine Soditus | Sep 11, 2025 | Recipes
Perfect for breakfast or lunchbox treats
Ingredients:
- 2 cups all-purpose flour
- 1/2 cup brown sugar
- 2 tsp baking powder
- 1 tsp cinnamon
- 1/2 tsp salt
- 1/3 cup melted butter
- 1 egg
- 1 cup milk
- 1 large apple, peeled and diced
- 1/4 cup rolled oats (for topping)
Instructions:
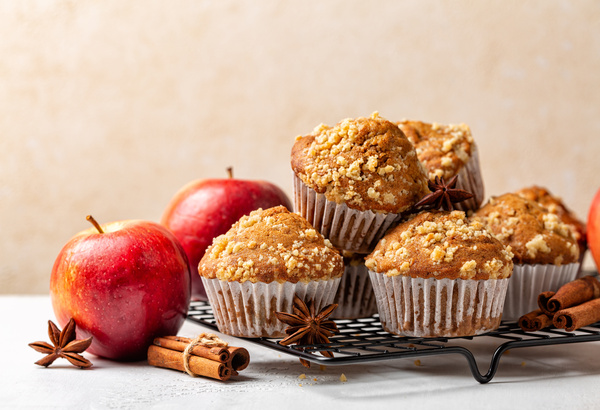
- Preheat oven to 400°F. Line muffin tin with paper cups.
- Mix dry ingredients in a large bowl.
- Whisk together melted butter, egg, and milk in separate bowl.
- Fold wet ingredients into dry ingredients until just combined. Don’t overmix!
- Gently fold in diced apples.
- Fill muffin cups 2/3 full and sprinkle with oats.
- Bake 20-22 minutes until golden brown.
Pro tip: These freeze beautifully for quick lunchbox additions and create an amazing aroma for home showings!
- Creamy Pumpkin Pasta Skillet
One-pan dinner that’s kid-friendly and impressive for guests
Ingredients:
- 12 oz penne pasta
- 1 can (15 oz) pumpkin puree
- 1 cup heavy cream
- 1/2 cup parmesan cheese, grated
- 2 cloves garlic, minced
- 1 tsp sage (dried)
- 1/2 tsp nutmeg
- Salt and pepper to taste
- 2 tbsp olive oil
- Optional: cooked chicken or turkey
Instructions:
- Cook pasta according to package directions, reserve 1 cup pasta water.
- In large skillet, heat olive oil and sauté garlic for 30 seconds.
- Add pumpkin puree, cream, sage, and nutmeg. Simmer 5 minutes.
- Add cooked pasta and parmesan cheese, tossing to combine.
- Add pasta water as needed for desired consistency.
- Season with salt and pepper.
This recipe scales easily for entertaining and creates that perfect “homey” feeling buyers love.
- No-Bake Peanut Butter Pumpkin Energy Balls
Healthy lunchbox snacks that require no baking
Ingredients:
- 1 cup old-fashioned oats
- 1/2 cup peanut butter (or almond butter)
- 1/3 cup honey
- 1/4 cup pumpkin puree
- 1/4 cup mini chocolate chips
- 2 tbsp ground flaxseed (optional)
- 1 tsp vanilla extract
- 1/2 tsp cinnamon
- Pinch of salt
Instructions:
- Mix all ingredients in a large bowl until well combined.
- Refrigerate mixture for 30 minutes (makes rolling easier).
- Roll into 1-inch balls using your hands.
- Store in refrigerator for up to one week.
- Pack 2-3 in lunchboxes for a protein-rich snack.
These are perfect for busy families and can be made ahead of time!
Bonus Staging Tip
When preparing any of these recipes before a showing, remember that the aroma of baking or cooking can create positive emotional connections with potential buyers. The smell of cinnamon and vanilla, in particular, suggests warmth and comfort – exactly what you want buyers to feel when touring your home.
Keep portions reasonable and consider packaging extras as small gifts for your real estate agent or potential buyers – it’s a memorable touch that helps your home stand out in their minds!
These recipes celebrate the best of fall flavors while being practical for busy lifestyles, whether you’re settling into a new home or preparing your current one for market.
by Katherine Soditus | Aug 19, 2025 | Recipes
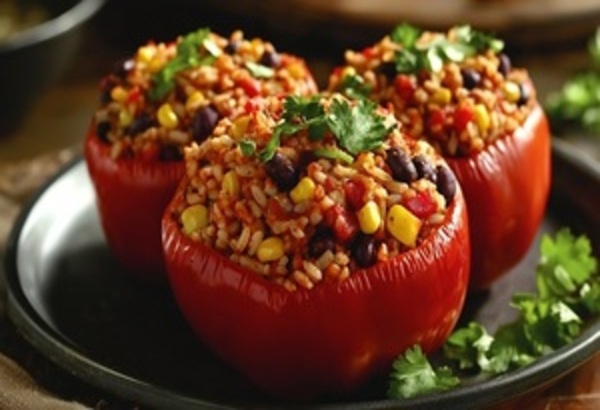
Whether you’re settling into a new home or hosting a casual dinner with friends, there’s nothing quite like a warm, hearty meal to make a house feel like home. These slow cooker stuffed bell peppers are a colorful, flavorful dish that is easy to prepare and perfect for busy days. Packed with wholesome ingredients and bold flavors, they are a great way to bring people together around the table.
Ingredients You’ll Need:
- 6–8 large bell peppers (any color you love)
- 3 cups cooked white rice
- 2 cans (15 oz each) black beans, rinsed and drained
- 1 can (14 oz) fire-roasted diced tomatoes
- ½ cup frozen corn
- 1 packet taco seasoning (we love Siete for a clean, flavorful blend)
- Salt and pepper to taste
Toppings to Serve:
- Sliced avocado
- Chopped fresh cilantro
- Sliced green onions
- Hot sauce or salsa
- Lime wedges
How to Make It:
- Prep the Peppers: Slice the tops off the bell peppers and gently remove the ribs and seeds. Be careful not to tear the peppers they’ll need to hold all that delicious filling!
- Mix the Filling: In a large bowl, combine the cooked rice, black beans, tomatoes, corn, and taco seasoning. Stir until everything is well mixed.
- Stuff the Peppers: Spoon the filling into each pepper, packing it to the top. Depending on the size of your peppers, you may need more or fewer.
- Slow Cook: Pour ½ cup of water into the bottom of a 6-quart (or larger) slow cooker. Arrange the stuffed peppers upright in the cooker, spacing them evenly.
- Cook Until Tender: Cover and cook on low for 6 hours or on high for 3 hours, until the peppers are soft and the filling is hot.
- Serve & Enjoy: Plate the peppers and top with your favorite garnishes, avocado, cilantro, green onions, salsa, and a squeeze of lime.
This recipe is perfect for a cozy night in or a casual gathering with neighbors. It’s plant-based, budget-friendly, and full of flavor, just the kind of dish that makes a house feel like home.
by Katherine Soditus | Jul 7, 2025 | Recipes
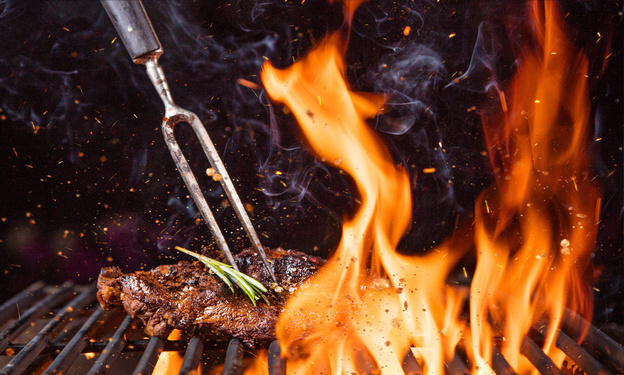
It’s peak barbecue season, and nothing says summer like the smell of burgers, ribs, or veggie kabobs sizzling on the grill. Whether you’re hosting a backyard cookout, enjoying a small family dinner, or just sneaking in a solo steak night, grill safety matters — especially in the heat of July.
Every year, thousands of fires and injuries are caused by grills, most of them preventable. So before you light up that charcoal or turn on the propane, let’s run through some BBQ safety tips to help you keep the food hot and the summer stress-free.
1. Grill Outside — Always
This might seem obvious, but it’s worth repeating: Never grill indoors — not in the garage, not under an awning, and definitely not inside a tent. Grills give off carbon monoxide, which is odorless and deadly. Plus, they pose a serious fire risk if used in enclosed or partially enclosed spaces.
Always set up your grill at least 10 feet away from your home, deck railings, or anything flammable like fences, shrubs, or patio umbrellas.
2. Check for Gas Leaks (If You Use Propane)
Before firing up a gas grill for the first time this season, check for leaks. You can do this easily by mixing a bit of dish soap with water and brushing it over the hose and connections. Turn on the gas (but not the grill) — if you see bubbles, that’s a leak. Tighten the connections or replace the hose before using the grill.
If you ever smell gas while cooking, turn off the grill immediately, move away, and don’t light it again until it’s inspected.
3. Keep a Close Eye on the Heat
Unattended grills are a leading cause of BBQ-related accidents. It only takes a few minutes for flames to flare up or for kids and pets to wander too close.
- Never leave your grill unattended while it’s hot.
- Keep children and pets at least three feet away from the cooking area.
- Have a fire extinguisher, bucket of sand, or baking soda nearby in case of a flare-up (never use water on a grease fire!).
4. Clean Your Grill Regularly
Grease buildup isn’t just gross — it’s dangerous. Clean your grill grates and empty the grease trap often to prevent unexpected flare-ups. A quick brush after every use and a deeper clean once a month during heavy BBQ season can make a big difference.
Bonus: Your food will taste better, too.
5. Know Your Tools and Setup
- Use long-handled utensils to avoid burns and splatter.
- Wear grill gloves or oven mitts rated for high heat — regular oven mitts may not cut it.
- Keep matches and lighters away from kids (even the curious ones).
- Never use starter fluid on an already-lit charcoal grill. If the coals are fading, add more charcoal — not lighter fluid.
6. Food Safety Counts Too
It’s not just the fire you need to watch — foodborne illness is a real risk in hot July weather.
- Use a meat thermometer to ensure safe internal temperatures:
- Chicken: 165°F
- Beef, pork, lamb: 145°F (with 3-minute rest)
- Ground meat: 160°F
- Don’t reuse plates or utensils that touched raw meat.
- Keep cold food in a cooler with ice until you’re ready to grill, and refrigerate leftovers quickly.
7. Be Weather-Aware
Grilling during a heatwave or on a windy day? Be extra cautious.
- In high temps, stay hydrated and take breaks in the shade. Heat exhaustion is no joke.
- On windy days, make sure your grill is on a stable surface, and be mindful of flying sparks or embers.
If your area is under a fire warning or drought restriction, check local rules before grilling — some areas temporarily ban outdoor fires during extreme conditions.
Final Thoughts: Grill Smart, Stay Safe
A barbecue should be relaxing — full of laughter, great food, and maybe a cold drink or two. By keeping safety top of mind, you can make sure your July cookouts go off without a hitch (or a fire truck).
So go ahead — fire up the grill, gather your people, and enjoy everything summer has to offer. Just keep that extinguisher nearby and the grill far from the house, and you’re golden.
Need help prepping your backyard for entertaining this summer? I’ve got local contractor and handyman referrals who can help you create the perfect (safe) outdoor cooking space — just reach out!
by Katherine Soditus | Jun 13, 2025 | Recipes
Prep Time: 5 minutes | Cook Time: 20 minutes | Total Time: 25 minutes
Servings: 4 | Calories: 336 per serving
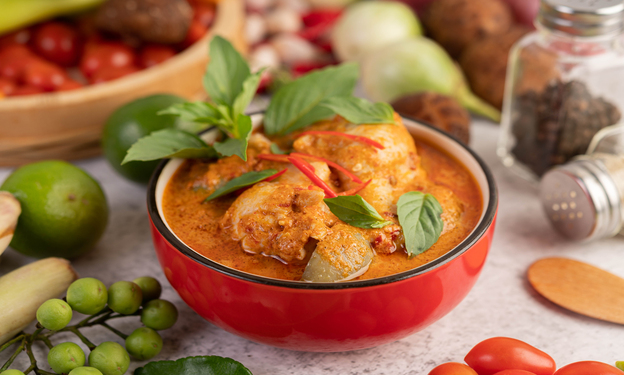
This quick and flavorful Instant Pot Butter Chicken recipe is a must-try for busy weeknights. With a rich, aromatic sauce and tender chicken, it’s the perfect comfort food, made even easier with the Instant Pot. Plus, it’s versatile enough for those following keto or dairy-free diets.
Ingredients:
* 1 (14-ounce) can of tomatoes
* 5-6 garlic cloves, minced
* 1-2 teaspoons minced ginger
* 1 teaspoon turmeric
* 1/2 teaspoon cayenne pepper
* 1 teaspoon smoked paprika
* 1 teaspoon kosher salt
* 1 teaspoon garam masala
* 1 teaspoon ground cumin
* 1 lb boneless, skinless chicken thighs (or breasts, bone-in, or any other cut of your choice; if frozen, add 1-2 extra minutes to the cook time)
* For finishing:
* 4 oz butter (cut into cubes) or coconut oil for a dairy-free version
* 4 oz heavy cream (or full-fat coconut milk for dairy-free)
* 1 teaspoon garam masala
* 1/4-1/2 cup chopped cilantro
Instructions:
- Prepare the Instant Pot:
Add all ingredients (except butter, cream, and 1 teaspoon of garam masala) into the Instant Pot. Stir well to combine the sauce before placing the chicken on top. If using frozen chicken, push it slightly into the sauce to help it defrost faster.
- Pressure Cook:
Close the Instant Pot lid, set it to high pressure for 10 minutes, and let the pressure release naturally for 10 minutes once cooking is complete. After that, carefully release any remaining pressure.
- Blend the Sauce:
Open the Instant Pot, remove the chicken, and set it aside. Use an immersion blender to blend the sauce until smooth and well combined.
- Finish the Sauce:
Add the cubed butter, cream, cilantro, and garam masala to the sauce. Stir until the butter melts and everything is well incorporated. It’s important to let the sauce cool slightly before adding the butter and cream to avoid thinning the sauce. If the sauce becomes too thin, simply refrigerate it for a bit to thicken.
- Store Extra Sauce:
At this point, you can remove half of the sauce and freeze it for later use, or store it in the fridge for 2-3 days.
- Serve:
Return the chicken to the sauce and heat through. If desired, break the chicken into smaller pieces (but don’t shred it). Serve over rice or zucchini noodles for a low-carb option.
Enjoy a comforting, rich meal with minimal effort and maximum flavor!
This recipe combines the ease of the Instant Pot with the bold flavors of traditional Indian butter chicken, making it a great addition to your weeknight dinner rotation. Whether you’re serving it to guests or enjoying a quiet night in, this dish is sure to impress!
by Katherine Soditus | May 27, 2025 | Recipes
Image by Aadil Khan from Pixabay
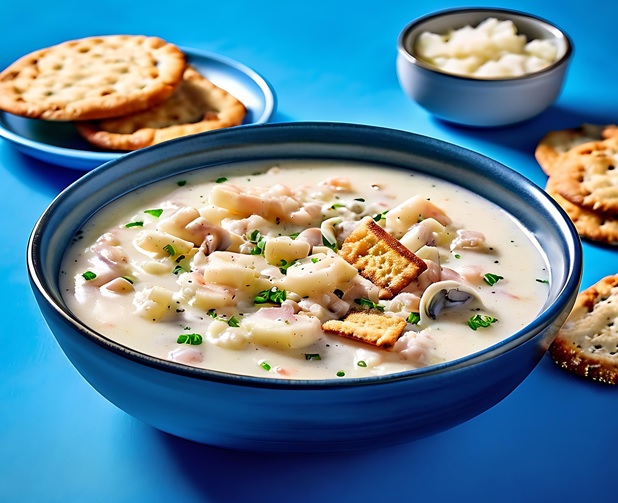
Woodman’s, of Essex Massachusetts, is the birthplace of the fried clam and makes a great clam chowder as well. This New England classic is made with just four ingredients – potatoes, onions, clams, and milk. Just be careful not to overcook the clams – they can turn rubbery in seconds!
Ingredients
– 4 cups diced potatoes (about 4 medium-large)
– 1 chopped onion
– 3 cups minced clams, with their juices
– 1 to 2 cups milk or cream (depending on how rich you want it)
– Salt to taste
– Butter
Instructions
- Put the potatoes and onions in a heavy, nonreactive pot with just enough water to cover them. Bring to a boil, then lower the heat so the liquid just simmers.
- Cook until the potatoes are tender, about 12 to 15 minutes, then add the minced clams and bring to a boil again. Boil for just 1 to 2 minutes – enough to cook the clams but not make them rubbery. Remove the pan from heat immediately and let the mixture sit for about 20 minutes.
- Return the pan to low heat and add the milk or cream. Cook just until the chowder is hot. Don’t let it boil. Taste and adjust the salt. Serve in heated bowls with pats of butter on top.
Enjoy your chowder!
by Katherine Soditus | Apr 21, 2025 | Recipes
Image by limarga26 from Pixabay
Prep: 20minutes Cook: 3hours hrs 30minutes mins
Servings 4
Ingredients
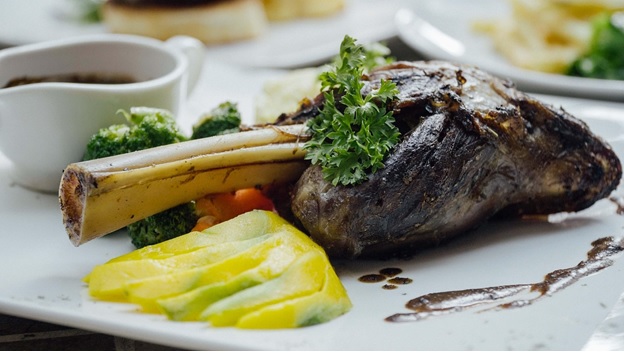
- 4 lamb shanks , around 13 oz / 400g each (Note 1)
- 1 tsp EACH cooking/kosher salt and pepper
- 2 – 3 tbsp olive oil , separated
- 1 onion , finely diced (brown, yellow or white)
- 3 garlic cloves , minced
- 1 cup carrot , peeled, finely diced (Note 2)
- 1 cup celery , finely diced (Note 2)
- 2 1/2 cups red wine (full bodied (good value wine, not expensive! Note 3)
- 800 g / 28oz can crushed tomatoes
- 2 tbsp tomato paste
- 2 cups chicken stock , low sodium (or water)
- 5 sprigs of thyme (preferably tied together), or 2 tsp dried thyme
- 2 dried bay leaves (or 4 fresh)
Instructions:
- Preheat the oven to 180°C/350°F (all oven types – fan and standard).
- Season shanks – Pat the lamb shanks dry and sprinkle with salt and pepper.
- Brown – Heat 2 tablespoons of olive oil in a large heavy based pot over high heat. Sear the lamb shanks in 2 batches until brown all over, about 5 minutes. Remove lamb onto a plate and drain excess fat (if any) from the pot.
- Sauté aromatics – Turn the heat down to medium low. Heat remaining 1 tablespoon of olive oil in the same pot. Add the onion and garlic, cook for 2 minutes. Add carrot and celery. Cook for 5 minutes until onion is translucent and sweet.
- Braising liquid – Add the red wine, chicken stock, crushed tomato, tomato paste, thyme and bay leaves. Stir to combine.
- Add shanks – Place the lamb shanks into the pot, squeezing them in to fit so they are mostly submerged. (Note 1)
- Oven 2 hours covered – Turn stove up, bring liquid to a simmer. Cover, then transfer to the oven for 2 hours (see notes for other cook methods).
- Uncovered 30 minutes – Remove lid, then return to the oven for another 30 minutes (so 2 1/2 hours in total). Check to ensure lamb meat is ultra tender – if not, cover and keep cooking. Ideal is tender meat but still just holding onto bone.
- Remove lamb onto plate and keep warm. Pick out and discard bay leaves and thyme.
- Sauce – Strain the sauce into a bowl, pressing to extract all sauce out of the veggies (Note 5 for repurposing the veggies). Pour strained sauce back into pot. If needed, bring to a simmer over medium heat and reduce slightly to a syrupy consistency (see video) – I rarely need to. Taste then add salt and pepper to taste (Note 5 on sauce taste).
- Serve the lamb shanks on mashed potato or cauliflower puree with plenty of sauce! Garnish with thyme leaves if desired.
Recipe Notes:
- Lamb Shanks – sizes vary considerably so make sure you get ones that will fit in your cooking vessel! 4 x 400g/13oz lamb shanks fits snugly in a 26cm/11″ diameter Chasseur dutch oven which is what I use. They don’t need to be completely submerged, just as long as most of the meaty end is mostly submerged, that’s fine. If you don’t have a pot large enough, you can switch to a baking dish for the slow cooking part, and cover with a double layer of foil if you don’t have a lid for it. You can also ask your butcher to cut the shaft so it bends if you are concerned, or to trim it slightly.
Cook time – 350-400g shanks should cook to “fall apart tender” but still holding onto bone in 2.5 hrs at 180°C/350°F. It can take up to 3 hrs, so to err on the side of caution re: dinner timing, give yourself 3 hours oven time. Shanks are the sort of thing that can sit around for ages and stay warm (keep covered in pot) and the flavour just gets even better. In fact, if you are cooking to impress, cook it the day before then reheat to serve – flavour will develop overnight, like with any stew!
- Onion, carrot and celery is the “holy trinity” of slow cooking, creating a beautiful flavour base for the sauce. It’s not a deal breaker to exclude the carrot and celery, but it does give the sauce an extra edge.
- Wine – Use a good value full bodied red wine, like cabaret sauvignon or merlot. Shiraz is ok too. No need to use expensive wine for slow cooked recipes like this (and the New York Times agrees). Use discount end of bin specials (I get mine from Dan Murphey’s). Pinots not suitable, too light. 99% of the alcohol in the red wine evaporates during cooking. The sauce does not taste winey at all, it completely transforms.
Non alcoholic sub: 1 1/2 cups beef broth LOW SODIUM, 1 cup water. + 1 tbsp Worcestershire Sauce. Beef has a stronger deeper flavour than chicken so will be more suited to being the sub for wine.
- Most of the alcohol in the red wine will evaporate during this step but not completely – it will finish evaporating during the slow cooking. The sauce does not taste winey at all, it completely transforms.
- Sauce options: The other option is to blitz the sauce using a sick blender. The sauce will be thicker, and you’ll have more of it (leftovers great tossed through pasta). This is what I used to do, but nowadays I prefer to strain the sauce because I like how glossy and rich it is – this is how restaurants serve it. You could also skip straining or blitzing, it just means you get little veg lumps in the sauce. All are tasty options, it mainly comes down to visual.
TIP: If you strain the sauce, keep the veggies etc in the strainer to make a terrific sauce, they are loaded with flavour even though all juice is squeezed out of them. What I do is make a basic tomato sauce with garlic, onion, canned tomato and water. Then I blitz that with the veggies. Use it to make a killer pasta or lasagna!!
Sour sauce? Sounds like there might’ve been issues with your canned tomatoes (poor quality = overly sour, good quality = sweet). Add a touch of honey or sugar, simmer for few minutes. Also, you didn’t rush the carrots/celery sautéing step did you?? Cooking them for 5 minutes sweetens them!
- OTHER COOK OPTIONS:
Slow cooker – Follow recipe to step 7. Bring sauce to simmer, scrape bottom of pot to get all brown bits into the liquid. Place shanks in slow cooker, add the sauce. Cook on low for 8 hours. Remove shanks, strain and reduce sauce to desired thickness on stove (if you blitz per Note 5, you won’t need to reduce).
Pressure Cooker – Follow Slow Cooker steps, cook for 40 minutes on high. Release pressure according to manufacturer directions. Stove – to cook this on the stove, cook for about 2 hours on low, ensuring that you check it at 1 hour then every 30 minutes thereafter to ensure there is enough braising liquid (because liquid evaporates faster on the stove) and the bottom of the pot isn’t catching. Turn the lamb shanks twice. You won’t get the brown crust, but the flavour is the same!